The subject being human in shape directed me towards researching portrait photographers, particularly those who use interesting lighting techniques themselves. I discovered a photographer by the name of Yousuf Karsh who has in his portfolio, images of greats such as Einstein, Picasso, Mother Theresa and Winston Churchill.
Karsh’s images show great variety in lighting which enabled me to reinforce lessons learned during the course of this unit. Karsh’s portrait of poet, W.H.Auden is lit from slightly behind so that the light skims across his face, highlighting the deep wrinkles which give great character. Martha Graham is lit from the side, creating large areas of light and shade emphasising her three dimensional form whereas the back lighting in Pablo Casals’ portrait shows merely the shape of the cellist. Karsh’s portrait of François Mauriac also shows shape but by using edge lighting to highlight the very edges of his features.
The above images, as well as many others can be found on Karsh’s website: http://www.karsh.org/#/the_work/portraits
Having considered the angles of light necessary to create my images, I then needed to think about the types of light I would use. As we have been blessed with so many glorious sunsets this month, I decided to start off my project using the natural light of the golden hour.
01 – ‘Setting Sun’ shows Bud, the monk sitting on the banks of the river with a stunning sunset in the background. This being my lighting for the first part of my set, I thought it fitting that my first image should show it in all its glory. This is the image I had in my mind as we drove to the river so I knew exactly what I needed to do. Placing Bud on a rock between myself and the setting sun, I set the exposure for the sky which had the effect of leaving the subject in total darkness, creating a silhouette. The lack of detail in all other aspects forces focus on the shape of the subject.

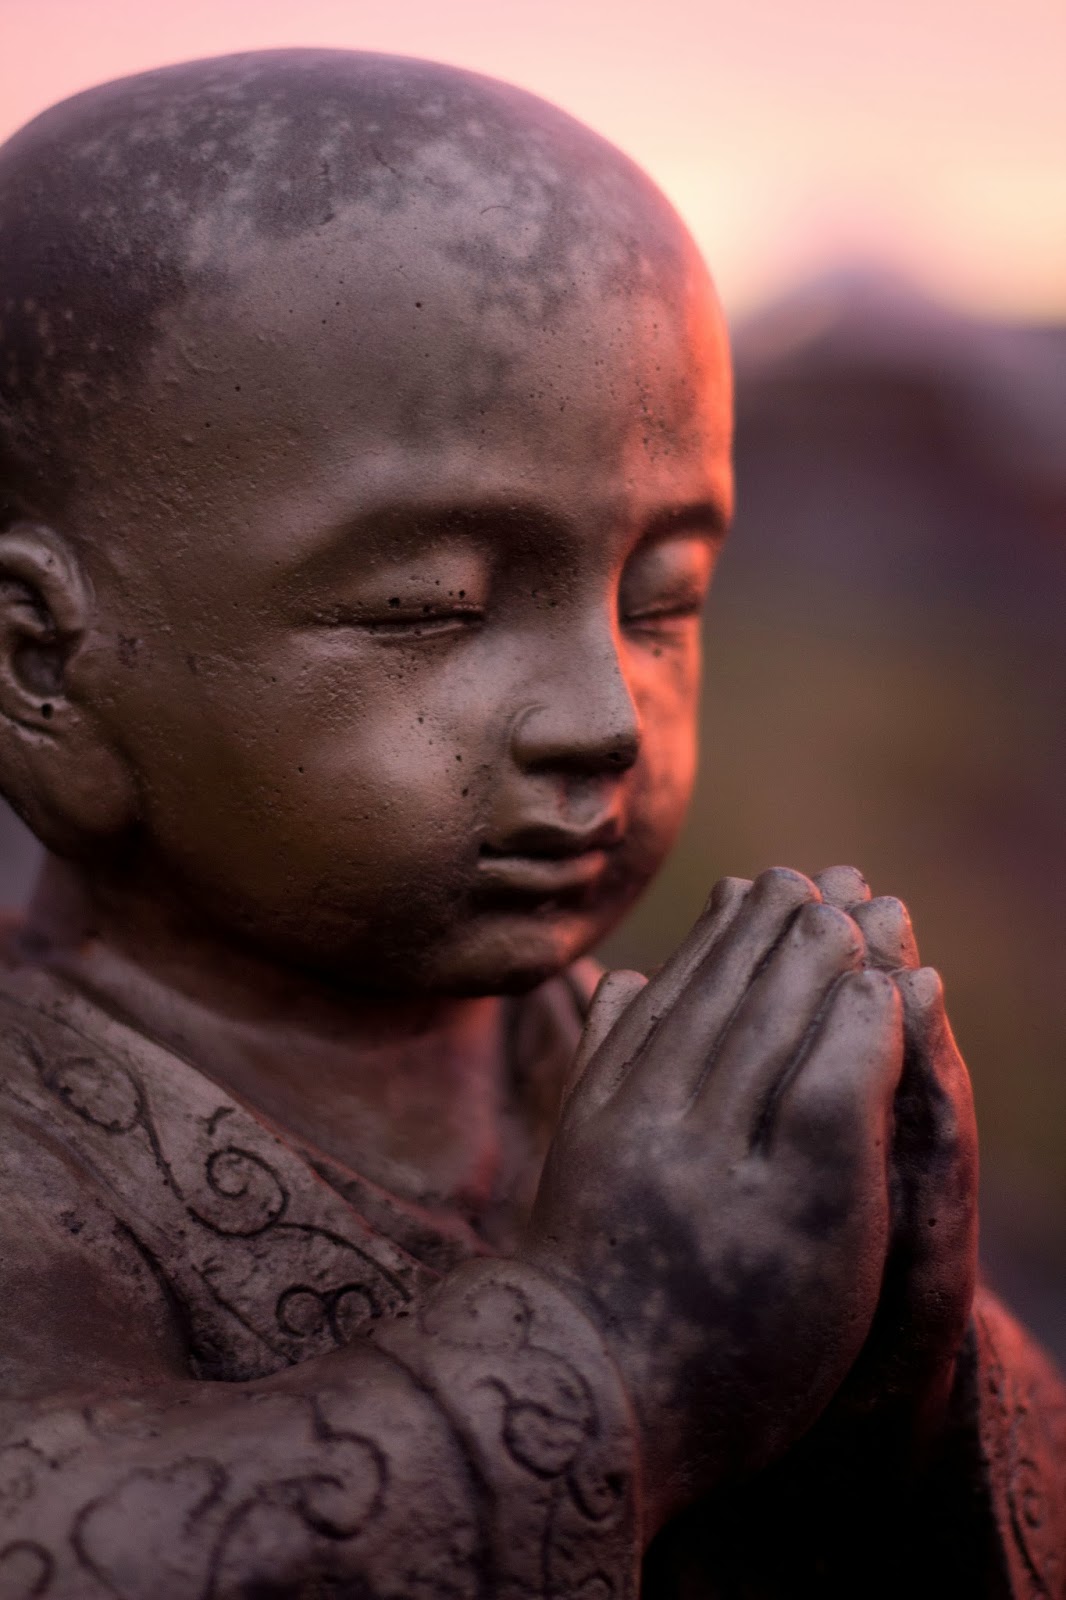
02 – In order to enhance colour in ‘Pink Prayer’, I moved around the subject and placed myself between him and the sun. This meant that now Bud was lit from the front, creating a flat but colourful image. In other front lit images using a more neutral coloured light, Bud’s colour is bright gold; however in this image, he reflects the colours of the sunset which lights him. The background colours are more down to luck than judgement as my main focus was on the direction of the light; however I am pleased with the resulting violet/green/orange combination of contrasting hues.


For the next part of my project, I wanted to use artificial light yet still wanted to keep the natural, outdoor setting for my images. I had the idea of using my car headlamps but as Bud is so heavy, I needed a platform strong enough for him to sit on. I found a car park nearby with just the right set up as shown below.

05 – The headlamps gave me just enough focussed light to really enhance the texture in ‘Star’. The rear-side angle enables the light to skim across the subject’s sleeve, trapping shadows in the sunken areas. The fading sunset adds colour to the opposite corner, adding movement and interest while the star remains the main focus.

06 – The rear-side lighting in ‘Cross-legged’ also skims across the subject, creating dark shadows and drawing attention to the texture of the clothing.

07 – In contrast to the deep lines displayed in the previous image, ‘Golden Hands’ shows minimal texture in the subject’s clothing. The purpose of this front lighting, although flattening the image somewhat, brings out the golden hues in its surface. As noted earlier, this colour is very different from the oranges brought out by the light of the setting sun.

08 – Still using my car headlamps, I turned Bud so that he was lit from the side. The acute lighting created a strong contrast image with hard shadows showing the form of the subject. Due to the triangular shadow under the eye, I have named this image ‘Rembrandt’. To enhance the depth of the image further, I used a shallow depth of field in order to soften the focus of the face.

09 – ‘Wide’ is also shot using side lighting; however in this image, the subject is turned to face the light and my lens is set to its widest angle of 18mm. The result shows Bud’s left foot looking much larger than his right; creating depth and therefore form in the image to compliment the effect of the lighting.

10 – My final image ‘Bedtime Prayers’ was taken using a diffuser to soften the glow from the headlamps. Again, shape is shown in the form of a silhouette, however in this image, the main subject is the backlit space between the face and hands.

Although I have only used two forms of light in this set, one natural and one artificial, I have used them in a variety of ways to show the different qualities of my subject. I’ve developed quite a bond with Bud during this process and hope that he’ll model for me again in the future.
No comments:
Post a Comment